Mold, when left unchecked, can cause structural damage to your home and pose serious health risks. Below are five crucial steps to ensure proper mold removal and thorough remediation.
Step 1: Assess the Extent of the Mold Problem
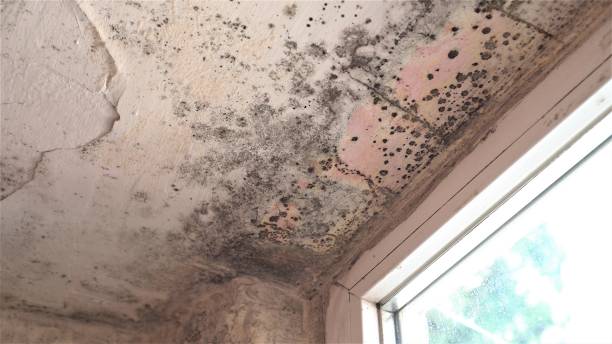
Before initiating any removal process, it is critical to evaluate the severity of the mold contamination.
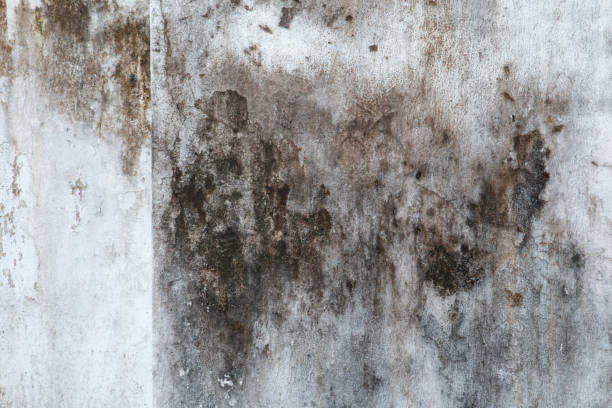
– Visual Inspection: Look for visible discoloration, water stains, or fuzzy growth on walls, ceilings, or other surfaces.
– Odor Detection: A musty smell in confined areas often indicates hidden mold growth.
– Testing (if necessary): Professional testing may be required in cases where mold is suspected but not visible. Air samples or surface swabs can help identify problematic areas.
A thorough assessment helps in determining whether professional intervention is needed or if the issue can be handled independently.
Step 2: Address the Source of Moisture
Mold thrives in damp environments; therefore, eliminating moisture is key to preventing further contamination.
– Fixing leaks in plumbing, roofs, or foundations. – Improving ventilation in high-moisture areas such as bathrooms and kitchens. – Using dehumidifiers to maintain indoor humidity levels between 30–50%.
| Source | Solution |
| Leaking roof | Repair shingles or apply sealing coat |
| Faulty plumbing | Replace damaged pipes |
| High indoor humidity | Use dehumidifiers |
| Poor ventilation | Install exhaust fans |
Failure to address underlying moisture problems will lead to recurring mold issues even after cleanup.
Proper containment reduces cross-contamination risks within your home.
Step 4: Remove Contaminated Materials Safely
Depending on the level of infestation, some materials may need replacement rather than cleaning. Follow these steps for safe material disposal and surface cleaning: 1. Remove porous items (e. g. , drywall, carpets) that cannot be salvaged. 2. Clean nonporous surfaces using EPA-approved biocide solutions. 3. Scrub hard-to-reach areas with a soft brush soaked in cleaning agents like hydrogen peroxide or vinegar solutions.
Always bag contaminated materials securely before discarding them to avoid spreading spores during transport.
Step 5: Dry and Restore the Area
Once all infected materials have been removed or treated: 1. Dry out affected spaces thoroughly using fans or professional-grade drying equipment. 2. Monitor humidity levels continuously during this stage. 3. Restore damaged sections by reinstalling drywall, painting walls with mold-resistant paint, etc. , only once everything is completely dry.
Maintaining a dry environment post-remediation ensures long-term success.
Proper adherence to these five steps will help you eliminate existing mold problems while safeguarding your home from future contamination risks through comprehensive remediation practices.
Effective Mold Removal Florida: Understanding How Moisture Contributes to Mold Growth
Mold thrives in environments where moisture is present, making it crucial to understand the role that water and humidity play in its growth. By addressing moisture issues, you can significantly reduce the risk of mold infestations in your home or workplace.
How to Prevent Mold Growth with Expert Mold Removal Services Florida
Mold spores are naturally present in the air and on surfaces, but they require specific conditions to grow.
- Moisture: The most critical factor for mold growth. Water from leaks, condensation, or high humidity creates an ideal breeding ground.
- Temperature: Most molds grow well between 60°F to 80°F (15°C to 27°C), temperatures commonly found indoors.
- Organic Material: Mold feeds on organic substances such as wood, drywall, carpets, and fabrics.
When these factors combine—especially with persistent moisture—mold colonies can form within 24-48 hours.
Common Sources of Indoor Moisture
Identifying typical sources of indoor moisture can help prevent mold issues.
| Source | Description |
| Leaking Pipes | Dripping or burst plumbing lines often lead to hidden mold growth. |
| Roof Leaks | Water entering through damaged roofing materials can seep into walls/ceilings. |
| Condensation | Forms on cold surfaces like windows or HVAC ducts due to temperature differences. |
| Flooding Events | Standing water from flooding provides ample moisture for mold formation. |
| Poor Ventilation | Traps humid air indoors, especially in areas like bathrooms and kitchens. |
Understanding How High Humidity Leads to Mold Growth and the Importance of Water Damage Restoration Florida
High levels of relative humidity (RH) indoors encourage mold proliferation even if there isn’t visible water damage. Ideal indoor RH should remain between 30–50%. Levels above 60% create favorable conditions for molds.
Ways to Control Humidity:
- Use dehumidifiers in damp spaces like basements.
- Ensure proper exhaust ventilation in bathrooms and kitchens.
- Seal crawl spaces to prevent external humidity intrusion.
Comprehensive Guide to Mold Inspection Florida and Moisture Control
- Fix leaks promptly around sinks, toilets, roofs, and appliances.
- Inspect gutters regularly to ensure proper drainage away from your property.
- Use fans or open windows when cooking or showering.
- Avoid placing furniture against walls that block air circulation.
- Invest in a hygrometer to measure humidity levels and adjust as needed with HVAC systems or portable dehumidifiers.
- Install sump pumps if groundwater tends to seep into basements or crawl spaces.
By understanding how moisture contributes directly to mold growth and taking preventive measures against excess water accumulation, you can maintain a safer indoor environment free of harmful contamination risks caused by molds.
Creating a Detailed Mold Remediation Plan to Address Contamination
Proper mold remediation begins with a well-thought-out plan. A detailed remediation plan ensures that the mold contamination is addressed systematically, minimizing risks to health and property.
Before taking any action, it’s crucial to evaluate how widespread the contamination is.Inspecting visible areasfor mold growth, such as walls, ceilings, and floors.hidden spaces, like behind drywall, under carpets, or inside HVAC systems. – Using tools like moisture meters or thermal imaging cameras to locate damp areas likely harboring mold.
A thorough assessment provides insight into whether professional assistance is necessary or if it’s safe to handle remediation independently.
Mold thrives in damp environments, so controlling moisture is key to preventing regrowth. During the planning phase: – Determine what caused the moisture issue (e. g. , leaks, floods, or poor ventilation). – Create a strategy for repairs—this might involve fixing plumbing issues or sealing cracks in walls.
Moisture control should precede cleanup efforts; otherwise, mold may return despite removal attempts.
Preventing cross-contamination during remediation protects unaffected areas of your home. Include these strategies in your plan: – Set up physical barriers using plastic sheeting. – Restrict access to contaminated spaces until remediation is complete.
Containment measures are especially important for large-scale contaminations or when working near high-traffic zones.
| Surface Type | Recommended Cleaning Method |
| Non-Porous (glass, metal) | Scrub with detergent and water; disinfect if necessary |
| Semi-Porous (wood) | Sand affected surfaces; apply antimicrobial solutions |
| Porous (carpets) | Remove and dispose if heavily contaminated |
For extensive mold damage on porous materials or structural components, replacement may be more practical than cleaning.
Safety during mold removal cannot be overlooked.
These precautions reduce exposure to airborne spores and protect against potential health risks such as respiratory irritation.
Establish criteria for determining successful remediation: – Absence of visible mold growth after cleaning. – Normal indoor air quality levels verified through testing.
Clear objectives help verify whether additional steps are required after initial cleanup efforts.
By following this structured approach to developing a remediation plan, homeowners can tackle mold contamination effectively while safeguarding their health and home environment from further damage.
Effective Methods to Remediate Mold Contamination in Your Home
Mold contamination can pose serious risks to both your health and home. Effectively remediating mold requires a combination of proper techniques, tools, and preventative measures to ensure the problem is thoroughly addressed. Below is a structured guide to tackling mold contamination in your home.
Before remediation begins, it’s crucial to locate the source of moisture or water intrusion enabling mold growth.
- Leaks from roofs, pipes, or windows
- High humidity levels in poorly ventilated areas
- Flooding incidents or standing water issues
Use tools like hygrometers or infrared cameras to detect hidden moisture that may not be visible to the naked eye. Addressing these issues first is vital to avoiding recurrent mold problems after remediation efforts are completed.
- Seal off affected areas using plastic sheeting and duct tape.
- Turn off HVAC systems temporarily in impacted zones as they can carry airborne spores throughout the home.
Safety precautions for those conducting remediation include wearing personal protective equipment (PPE): gloves, goggles, N95 respirators or half-face respirators with P100 filters, and disposable coveralls.
| Material Type | Recommended Action |
| Drywall/Plaster | Replace damaged sections entirely |
| Insulation | Remove and replace |
| Carpets/Rugs | Dispose of if deeply infested or soaked |
| Upholstered Furniture | Clean with professional-grade products OR dispose |
Non-porous surfaces such as glass, metal, or hard plastic can usually be cleaned and disinfected thoroughly.
- Vacuum with HEPA Filter:Start by vacuuming the area with a HEPA-filtered vacuum cleaner designed to trap fine particles like mold spores effectively.
- Scrub Affected Surfaces:Use soap/detergent mixed with water on non-porous surfaces before applying an antimicrobial treatment.
- Disinfect Carefully:Apply EPA-approved fungicides or disinfectants specifically labeled for use against molds.
- Dry Thoroughly:Use industrial-grade dehumidifiers or fans designed for drying processes after cleaning.
Avoid using bleach on porous surfaces since it does not penetrate deeply enough and may fail at removing root structures (“hyphae”) of certain molds.
- Install exhaust fans where necessary (bathrooms/kitchens especially).
- Maintain indoor relative humidity levels between 30%–50%.
Regular inspection services ensure no recurrence signs arise long-term maintenance plan .
How to Determine If Your Mold Cleanup Efforts Have Been Successful
Evaluating the success of mold cleanup efforts involves a combination of visual inspections, monitoring environmental conditions, and conducting professional testing when necessary. Below are key steps and methods to determine if your remediation efforts have achieved the desired results.
Conduct a Thorough Visual Inspection
- Inspect all treated areas:Ensure that no visible signs of mold (such as discoloration or growth) remain on surfaces previously affected.
- Check hidden areas:Look behind furniture, inside ducts, and in corners or crevices where mold could still exist undetected.
- Assess surface cleanliness:Surfaces should be free from visible dust, dirt, or stains that might indicate incomplete cleaning.
Monitor Moisture Levels
- Use a hygrometer:Measure indoor humidity levels regularly. For most homes, maintaining relative humidity between 30% and 50% can help prevent new mold growth.
- Inspect for water damage:Check for leaks or condensation in areas prone to moisture buildup (e. g. , basements or near plumbing fixtures).
- Ensure proper ventilation:Verify that exhaust fans in bathrooms and kitchens are working effectively to reduce moisture accumulation.
Perform Odor Assessments
Mold often leaves behind a distinct musty odor even after it has been cleaned up:
– Smell the air in previously contaminated spaces:A lingering mustiness could indicate remaining spores or unaddressed sources of contamination.
– Check adjacent areas:Mold odors might migrate through walls or ventilation systems into other rooms if remediation was incomplete.
Consider Professional Air Quality Testing
In some cases, hiring professionals for air quality testing can provide additional assurance:
– Professionals use specialized equipment to detect mold spores in the air that may not be visible to the naked eye.
– A comparison between spore counts indoors and outdoors can reveal whether levels have returned to normal thresholds.
| Test Type | Purpose | Costs (Approx.) | Need for Professional Help? |
| Air Sampling | Checks airborne spore levels | $200-$600 per test | Yes |
| Surface Testing | Verifies absence on surfaces | $150-$300 per sample | Optional but recommended |
| ERMI Analysis | Comprehensive home screening | $300-$700 | Yes |
Evaluate Occupant Health
The health and well-being of those living or working in the space can also indicate whether mold removal was successful: – Assess symptoms:Consider whether symptoms like allergies, respiratory issues, or headaches have decreased post-remediation.Track progress over time:If health problems persist despite cleanup efforts, further investigation into hidden mold sources may be required.
Ensuring thoroughness at every stage helps confirm that your remediation process has been effective and prevents recurring problems associated with mold contamination.
- Effective Mold Remediation Florida: Understanding the Link Between Water Damage Restoration and Mold Removal
- Effective Mold Remediation Florida Solutions: Best Cleaning Agents for Stain Removal
- 5 Essential Steps for Effective Mold Remediation Florida Homeowners Need to Know
- Comprehensive Guide to Mold Removal Services Florida: Costs, Factors, and Money-Saving Tips
- Effective Mold Removal Florida: Addressing Flooded Homes and Preventing Mold Growth
- Effective Tips for Mold Removal Florida Homeowners Need to Know
- 5 Vital Benefits of Hiring Professional Mold Remediation Florida Experts for a Safer Home
- Effective Mold Remediation Florida Tips: Ventilation and Moisture Control Strategies